How to remove POP3 account emails from a server
Managing storage space is one of the biggest bugbears for people with Outlook email accounts. If you do not remove unwanted emails regularly, storage space can run out, and your emails can grind to a halt.
What many people do not realise is that when you receive an email, your email server creates and stores a copy of it before sending it on to your PC.
The good thing about this is that you can retrieve an email if it is accidently deleted. The bad thing is that it adds to the problem of your email account getting clogged up more quickly.
This blog post aims to show you that managing emails, and making sure you do not run out of server space, is easier than you may think. It can be done quickly with a few clicks.
Removing POP3 emails
We have created this step-by-step guide about how to remove the copies stored on the email server while keeping them on your computer.
This guide is only for a POP3 account – for an IMAP account, see our other guide.
A bit of email background
Before we get to the nitty gritty, a bit of background.
It is normal practice for the mail server to keep copies of all the emails for a few days. This is the basic flow of emails on the server:
 Then, click on the "More Settings" button.
Step 3: Configuration
Click on the "Advanced" tab.
Then, click on the "More Settings" button.
Step 3: Configuration
Click on the "Advanced" tab.
- An email is sent to your account and picked up by the server.
- The server creates a copy and stores it, then sends the email to your devices.
- You delete the email from your computer, but that doesn’t remove the copy from the server.
Navigate to File Tab on the tool bar, and open up the account settings window by clicking on the ‘account settings’ drop down box, then account settings again.
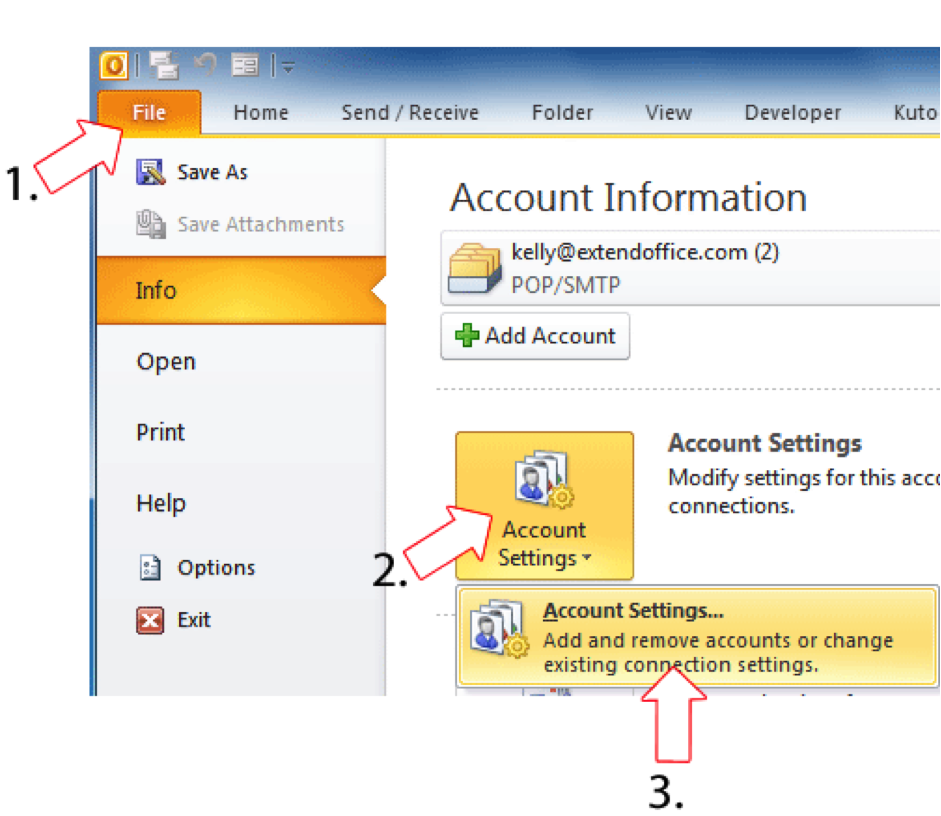
This will open a window with a list of your email accounts.
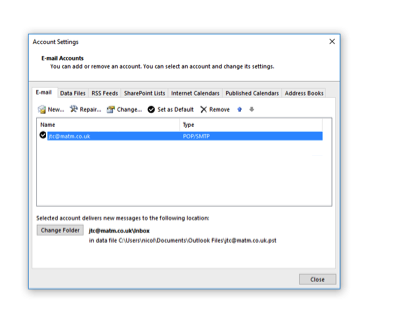
Then, click on the "More Settings" button.
Step 3: Configuration
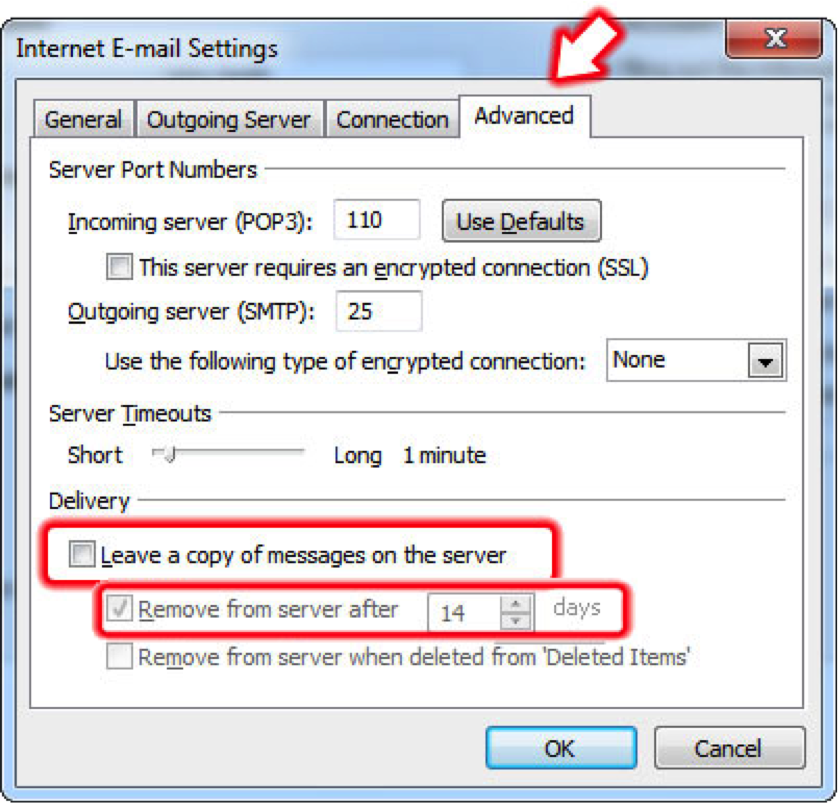
Click on the "Advanced" tab.
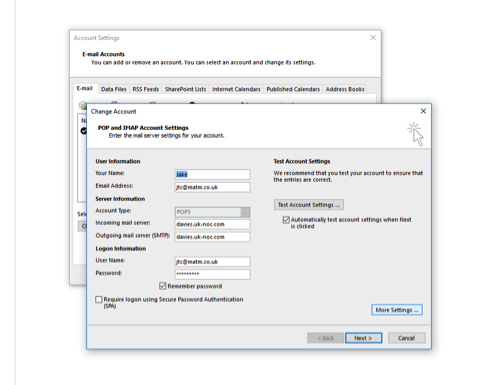
To set up the account so the emails are regularly removed from the server after a certain number of days, make sure that ‘Leave a copy of messages on the server’ is ticked as well as ‘Remove from the server after X days’.
Select the number of days in the box. One week should be plenty of time.
Note, this process deletes the copy of the email from the email server but NOT from your computer.
Click "OK" to save the settings, and you’re done.